

 Christina Darby/
 I'll confess: part of my decision to purchase my4th-gen iPad Air over a much-needed new laptop was due to its compatibility with theApple Pencil . With my preference for handwritten notes and reminders and Apple's seamless calendar integration, I was beyond excited for the stylus to be my literal right-hand tool as I penciled in my plans for the New Year.
Also: 3 ways to take notes with an Apple Pencil
But writing with the Apple Pencil is one thing, and pairing it to your iPad is another. In fact, with there now being two generations of Apple Pencils and a few too many iPad models, you'll want to make sure you're buying a compatible duo first and then know the deets for how to connect them together afterward.
The Apple Pencil (1st Gen) is compatible with the following iPad models:
The Apple Pencil (2nd Gen) is compatible with the following iPad models:
At the rounded end of the Apple Pencil is a silver magnetic cap that covers the Pencil's key to pairing and charging: the Lightning connector.
You can initiate the pairing by removing the cap with a flick and then plugging it into your iPad's charging port. The same procedure goes when charging the accessory.
Note: If you have a10th Gen iPad with USB-C, the first-generation Apple Pencil is still compatible, but you will have to use a USB-C to lightning adapter and USB-C to USB-C charging cord to pair and charge.
June Wan/
Once the Pencil's Lightning connector is connected to the iPad, a "Pair" button will pop up on your display, inviting you to connect the accessory.
Review: iPad 2022 (10th Gen): A confusingly good iPad
Unless you factory reset the iPad, the Apple Pencil will remain connected to the tablet and no longer require the setup process just mentioned.
With the newer Apple Pencil, the pairing process is simpler and (thankfully) more aesthetically pleasing.
For the 2nd-Gen Apple Pencil, start by making sure your iPad's Bluetooth is turned on. You can find it by going to your settings and then Bluetooth. This can also be done by swiping down on the upper-right corner of the home screen and tapping the Bluetooth quick toggle.
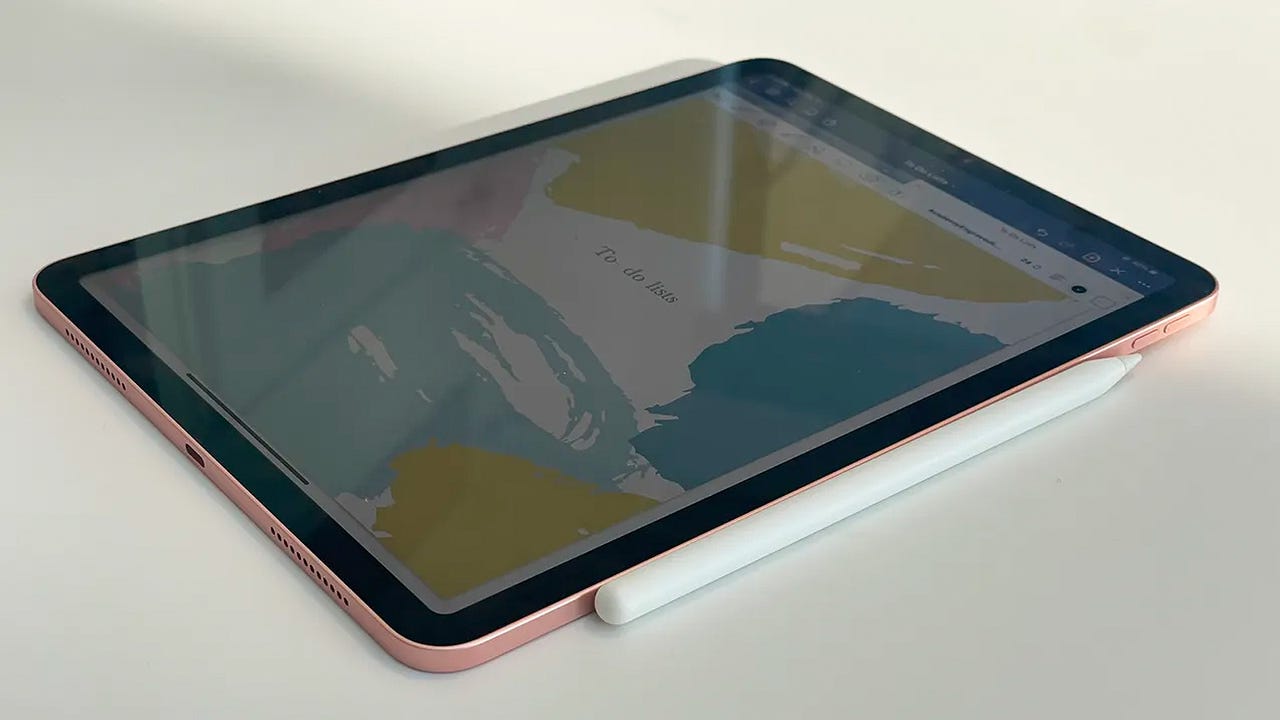
Pairing the 2nd Gen Apple Pencil is as easy as magnetically attaching it to the side of the iPad.
Christina Darby/Like how you would slip a pen or pencil down a notebook's spiral, the Apple Pencil magnetically attaches to the iPad's right-hand side when held in portrait orientation.
Once the Apple Pencil magnetically attaches, the iPad should detect the accessory, give you a prompt to continue pairing, and show a brief how-to for how to write with it.
The same procedure goes for charging. As long as your 2nd Gen Pencil is clipped onto the iPad's right side magnetic strip -- and your iPad has enough battery to distribute, of course -- your Apple Pencil will automatically charge.
If you're having difficulty pairing your Apple Pencil, your Bluetooth settings may not be turned on or your Pencil, or even iPad, may not be charged.
Make sure your Bluetooth is turned on in your iPad's settings, then connect the pencil to the right side of the iPad's magnetic connector strip. From there, your iPad should recognize your Apple Pencil.
Besides compatibility, the differences between the 1st and 2nd-gen Apple Pencils come down to feel and functionality. The 2nd-gen Apple Pencil feels and writes more like a regular pencil, with flattened edges on the side to enhance the grip while serving as a touchpoint for controls. The 1st-gen Apple pencil is more rounded and comes with a removable cap for Lightning connectivity.
 Tags quentes :
Computação
Comprimidos
iPad