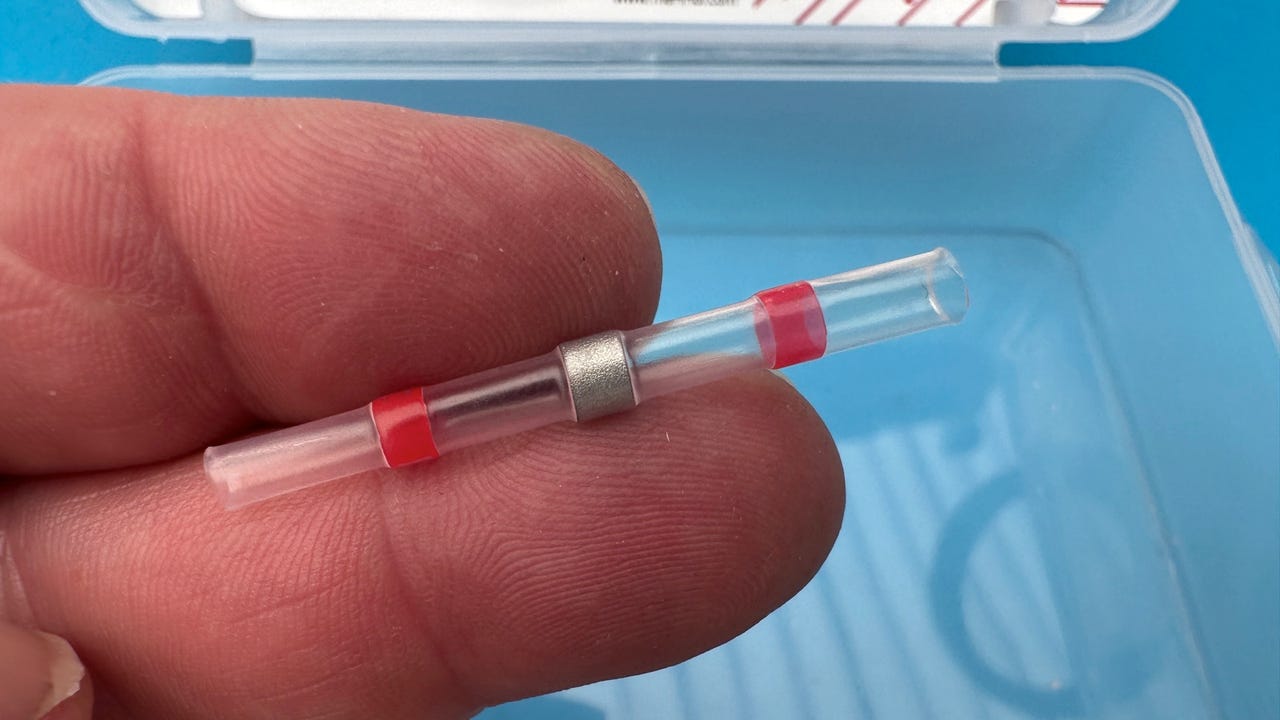


A heat-shrink butt connector -- perfect for joining wires together!
Adrian Kingsley-Hughes/My how-to post on soldering yielded some feedback from readers asking for my opinion of heat-shrink butt connectors .
Yeah, I know. I've been using these for years and the name still makes me chuckle. Sadly, my kit calls them "solder sleeve connectors" but they're the same thing.
Also: This tiny USB-C tester can spot counterfeit Apple chargers
So, what are heat-shrink butt connectors? When should (and shouldn't) you use them? And how do you use them properly?
Solderless, crimpless, butt connectors. All you need is just a heat gun to create a solid, weatherproof joint.
View at AmazonHeat-shrink butt connectors (yeah, I'm still giggling) are sleeves of heat-shrink tubing with a ring of solder in the middle and two rings of adhesive at each end.
You apply heat, and the solder melts to join the wires together and the glue softens to create a weatherproof seal.
Also: How to solder: Tools, tips, and tricks to get you started the easy way
So, when should you use a heat-shrink butt connector?
Here's whennotto use a heat-shrink butt connector:
As for voltages, I've seen these connectors rated to 600 volts. However, I would never use them for anything more than 12/24V automotive or marine applications.
Also: This is the perfect mini electric screwdriver
For AC power, I'd use aWago connector (these are rated to 32A/450V), but I always recommend getting professional advice when dealing with power lines.
Strip 1/4 inch of insulation from the ends of the wires that you want to connect. If possible, twist the exposed wire strands together to create a tight connection. (This might not be possible with some wire.)
These connectors come in a variety of sizes. Follow the guidance on the packaging as to which size to use (and put the lid back on the box when you've chosen one so you're not playing pick-up off the floor with the rest of the butt connectors).
Slide the connector over one of the wires, making sure the wire is inserted all the way into the connector. Repeat this step with the other wire.
Position the connector so the exposed wire ends are touching each other.
Use a heat gun or a lighter to heat the entire connector until the solder inside melts and flows around the wire strands. Make sure to apply heat evenly to all sides of the connector to ensure a good connection.
Once the solder has flowed around the wires, allow the connector to cool completely before handling it. The solder will harden as it cools, creating a secure and permanent connection.
Check the connection to ensure that the wires are securely connected and that the tubing is tightly sealed around the connection.
Wires aligned and ready for the heat to shrink the connector.
Adrian Kingsley-Hughes/Personally, I'm not a fan of using naked flames to shrink the butt connector, because, well, things can burst into flames.
Fire!
Adrian Kingsley-Hughes/I find usinga hot air gun from a rework station to be safer and less dramatic.
Shrinking a butt connector with a hot air gun.
Adrian Kingsley-Hughes/A perfect joint!
A perfect joint!
Adrian Kingsley-Hughes/I like to finish with a bit ofadhesive-lined heat-shrink over the entire repair, giving it extra stability and weatherproofing.
Also: This has replaced my multitool for a fraction of the cost
Remember, if you're going to do this you need to fit the heat-shrink onto the wire you're joining before joining them together with the butt connector.
I like to finish with a bit of heat-shrink over the entire repair.
Adrian Kingsley-Hughes/That's a repair to be proud of!
 Tags quentes :
Nosso processo
Home & Escritório