









 Jack Wallen/
 We often take for granted our dexterity. For example, I can easily glide my finger over a trackpad, stop where I need it, and tap to click and interact with an app or website. I can do that all day if needed.
That's not the case with everyone. And given some sites and apps can get very tricky to navigate, what can be done? If you're a Chromebook user, there's a handy feature built into the OS that can help a great deal with this.
Also: 5 reasons why Chromebooks are the perfect laptop for most people
The feature in question is the accessibility-focused automatic touchpad clicks and it works like this: You move your finger over the trackpad to the spot you want to click. Stop moving your finger and the touchpad will automatically register a click.
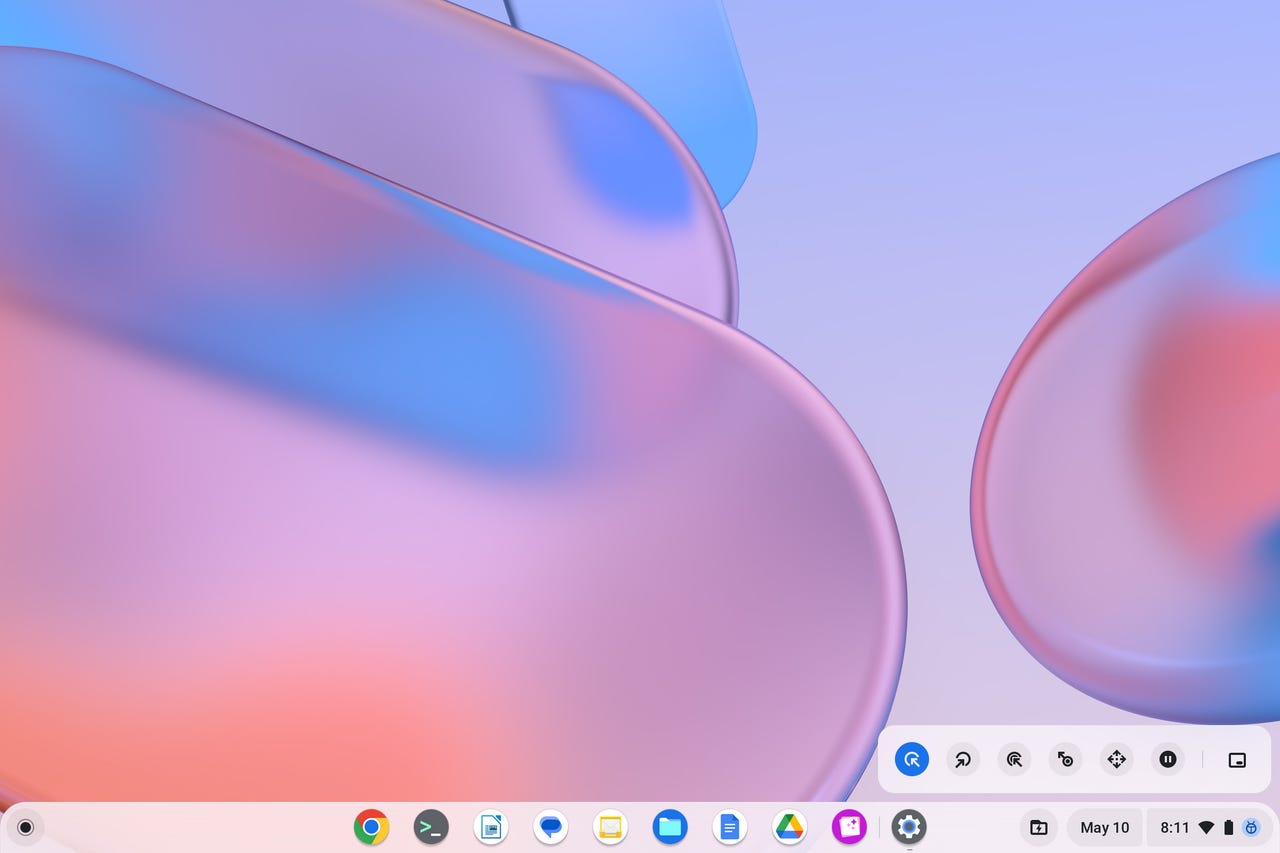
With the feature enabled, it will add a new toolbar above your panel, where you can choose between a left-click, right-click, double-click, click-and-drag, scroll, and pause.
It does take some getting used to the feature, but once you do, you'll find interacting with your Chromebook to be considerably easier.
Also: The best Chromebooks for students (and why they're great for school)
Let me show you how to enable the feature.
What you'll need:The only thing you'll need to make this work is a Chromebook with an updated version of ChromeOS. I'll demonstrate this with ChromeOS 113.0.5672.85.
Log in to your Chromebook and open the Settings app from either the desktop menu or by clicking the gear icon in the system tray popup.
You can also enable and disable automatic clicks from the Accessibility drop-down from the system tray pop-up.
Jack Wallen/In the Settings app, click Accessibility. From that page, click Cursor and touchpad.
There are a number of options to configure within the Accessibility section of the Settings app.
Jack Wallen/In the Cursor and touchpad section, click the On/Off slider for Automatic clicks until it's in the On position. Once you've done that, you can adjust the delay before clicking settings from between 0.6 seconds to 4 seconds.
Also: The best Chromebooks for work
You'll have to play around with this setting to get it just right for your needs. You might also want to enable the Ignore minor cursor movements but, again, this will be dependent on your needs.
You can fine-tune automatic clicks here.
Jack Wallen/One final feature you might want to disable is the large mouse cursor. When you enable Automatic clicks, the mouse cursor is considerably larger. If that bothers you, disable the feature and it will return to normal size.
After you enable the feature, you'll find a new toolbar that floats around (to stay out of your way). That toolbar allows you to select what action occurs after the cursor stops moving. By default, it's set to left mouse click. You can change that action at any time by clicking one of the icons.
You manage what automatic click controls from the floating toolbar.
Jack Wallen/The right-most icon allows you to dock the toolbar in one of the four corners. By default, the toolbar will be in the bottom right corner. Click the right-most icon and it will move to the bottom left corner. Click the icon again and the toolbar shifts to the top-left corner. A fourth click and the toolbar moves to the top right corner. Move the toolbar around until its position best suits your needs.
Also: How to enable Linux on your Chromebook (and why you should)
If there's ever a time when you want to pause automatic clicks, simply click the pause button on the toolbar. When you want to resume automatic clicks, tap the pause button again and you're good to go.
This ChromeOS feature can come in very handy for those who have trouble tapping or clicking their Chromebook touchpad. Give automatic clicks a try and see if it doesn't greatly enhance your Chromebook experience.
 Tags quentes :
Vida Profissional
Produtividade