






In a previous post we introducedCI/CD as a Service (CD/CDaaS)and talked about how it can transform and increase the efficiency of your DevOps practice, that can now serve development and Line Of Business (LoB) teams better.
In this post we will show how to effectively create a CI/CDaaS with Cisco CloudCenter, either for an organizations' internal use or to offer it to your customers, in case you're an IT service provider.
With our CI/CDaaS we will be able to:
Everything we describe is implemented using Cisco CloudCenter as the main orchestration engine, in a multicloud context, meaning you can select any private or public cloud as a target for the deployment).
The next picture represents a project leader ordering the deployment of the CI/CD toolset for two distinct projects, possibly in different clouds.
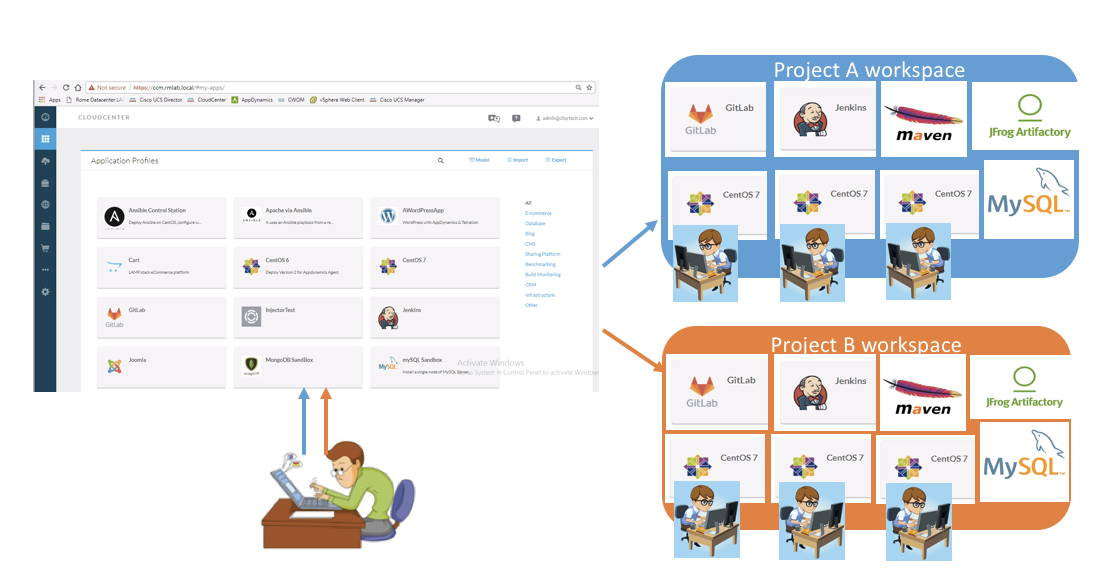
Creating a complete chain for CI/CD with no human intervention, for two different tenants, with CloudCenter
Accessing the self-service catalog in CloudCenter, the user can order the deployment of a single application or a complex set of components, like our CI/CDaaS service (we call these Application Profiles):
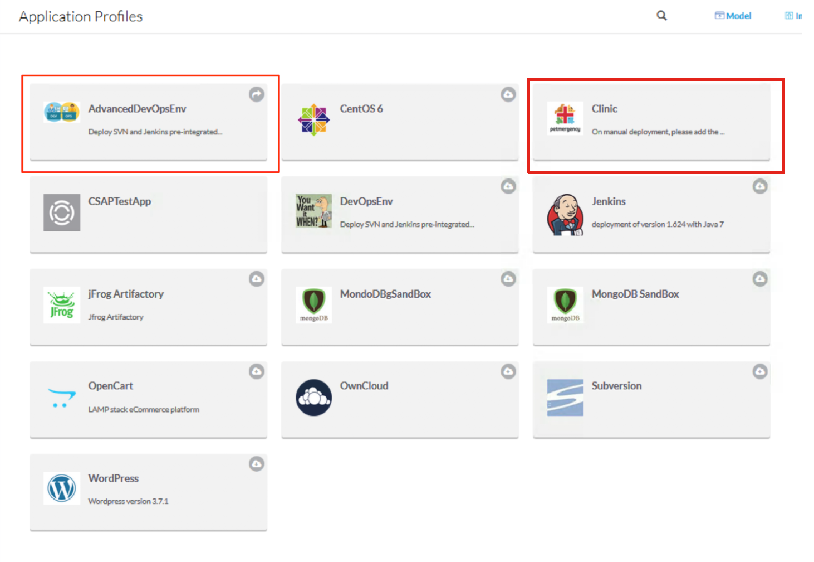
Application Profiles in the self-service catalog
As you can see from the image above, we have created 2 Application Profiles for this demo. The use case is having a development team that releases daily builds of a web application (PetClinic), so we have built:
1. A cloud-agnostic Application Profile to deploy PetClinic, that takes the binary files required for the deployment from a common repository (that will be the Artifactory server created by our CI/CD service described below). The name of this Application Profile (that is a service in the CloudCenter catalog) is "Clinic". You can select one specific version of the application binaries that you want to deploy from the Artifactory repository (by default you use the last build available).
Please note that we will not focus on the way a generic Application Profile is built and deployed, because it's covered in the CloudCenter documentation, but PetClinic is functional in our example as developers will generate new builds that need to be deployed.
2. A cloud-agnostic Application Profile to deploy the CI/CD toolset including SVN, Jenkins and Artifactory, installed in their own VM. The name of this service in the CloudCenter catalog is"AdvancedDevOpsEnv"; it creates an operating project environment where the "Clinic" application can be deployed automatically at every new commit made by a developer.This is the implementation of our CI/CDaaS concept.
When you "order" the AdvancedDevOpsEnv service you have to set the name of the new project and some options for the deployment (which cloud target, the amount of resources to be allocated when VM or containers are created, etc.); the next picture shows the order wizard in CloudCenter, where you make these selections.
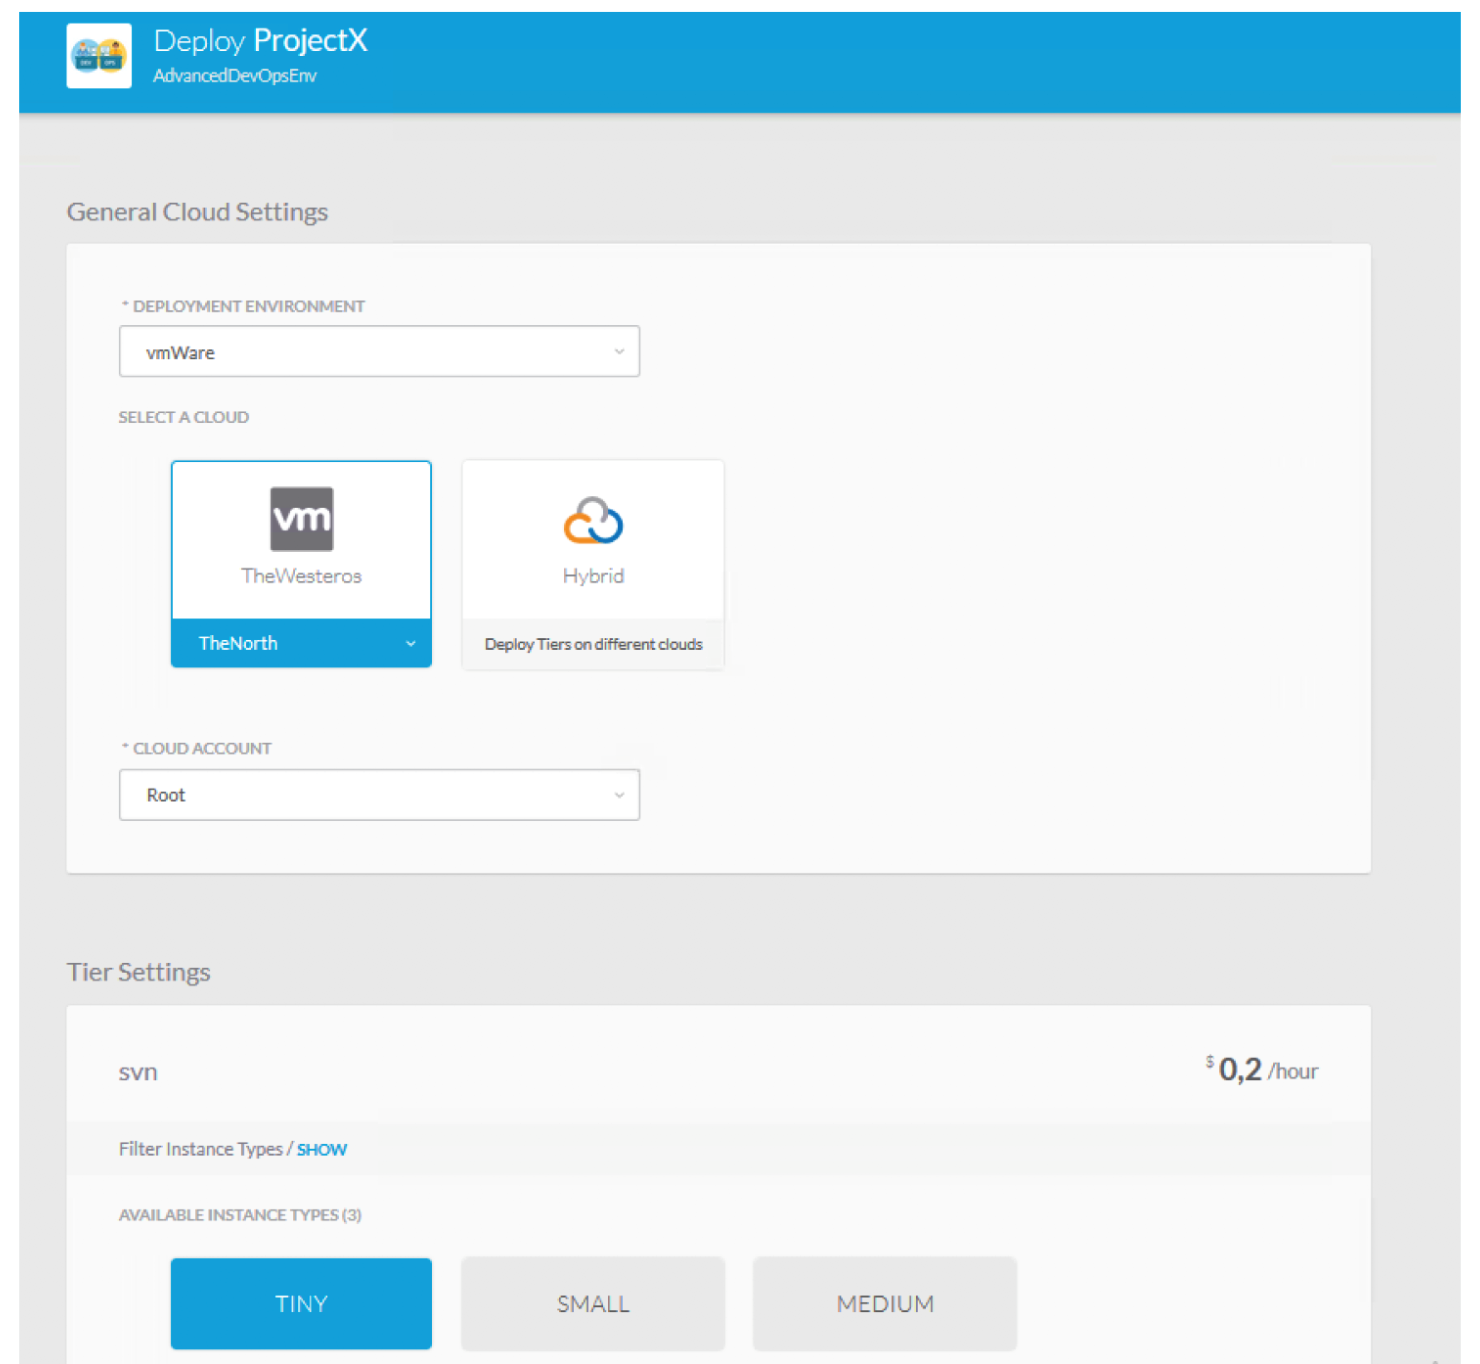
CloudCenter order wizard: you can choose where to deploy the CI/CD toolset and the size of each VM
You can monitor the progress of the deployment while the job runs (it takes approximately 15 minutes to complete) as you can see in the image below:
 Watching the progress in CloudCenter: last deployment state is "Deployed"
Once the deployment is complete, you can see the details of the new VM that has been created by clicking on the server representation on the left (e.g. Jenkins -see next picture) and expanding the list of running nodes on the right.
Please Note:
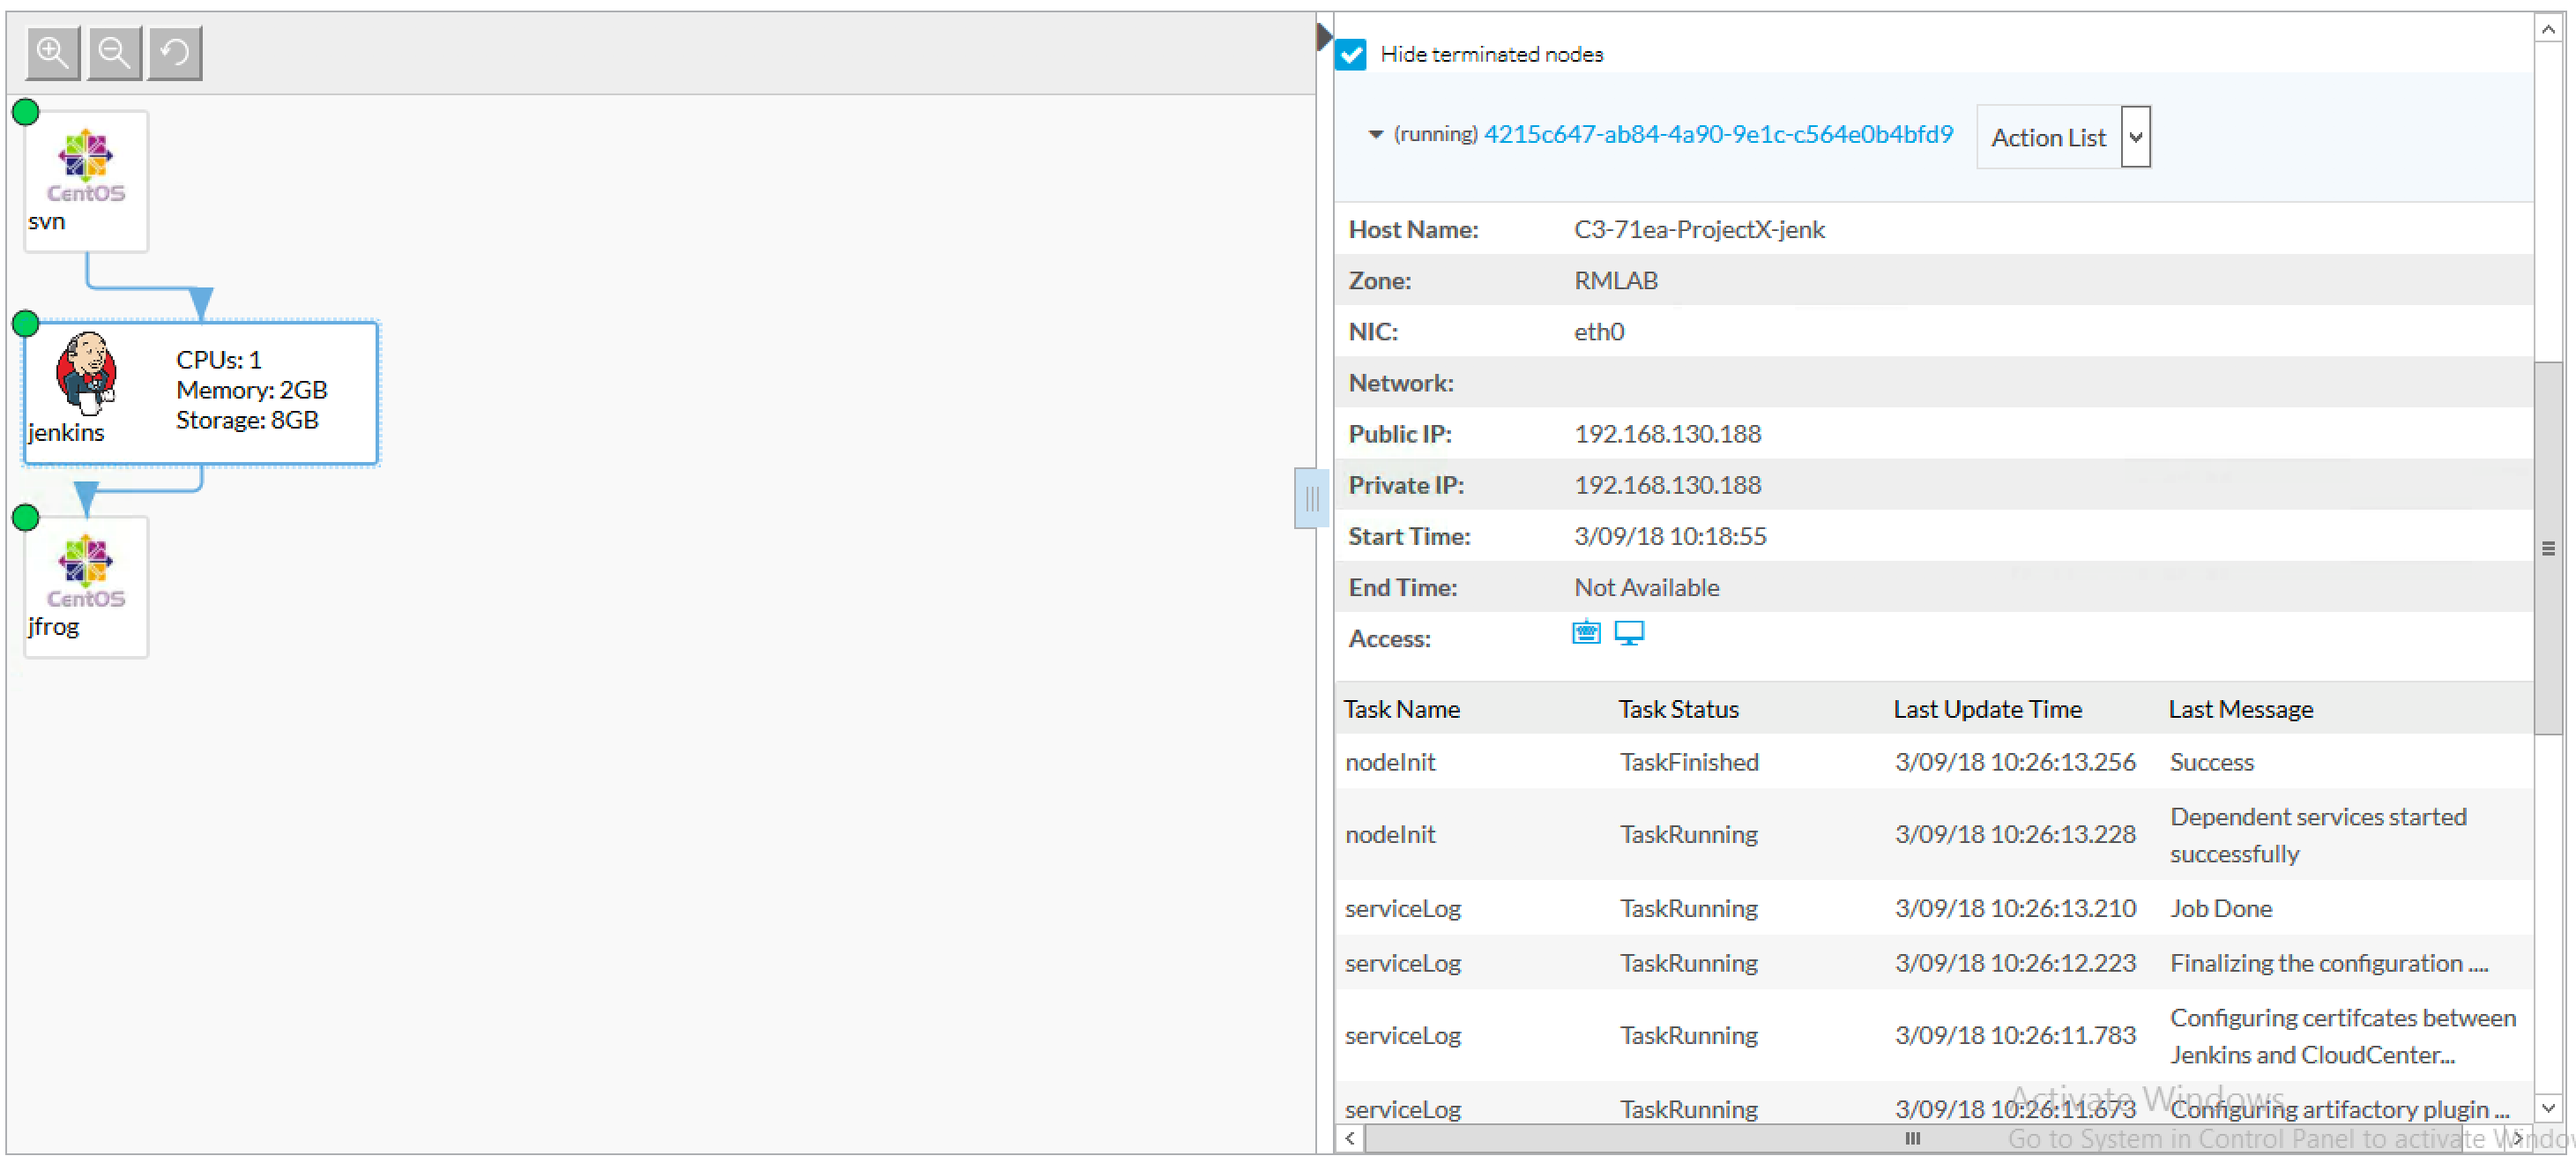
Accessing the details of the VM and the log of actions executed by the agent
The Jenkins orchestrator is automatically setup with a connection to the SVN source code repository (see the Jenkins job "repo1", that is the name provided by the user for the repository when he ordered the deployment) and with Cloud Center (see the Jenkins job "deploy").
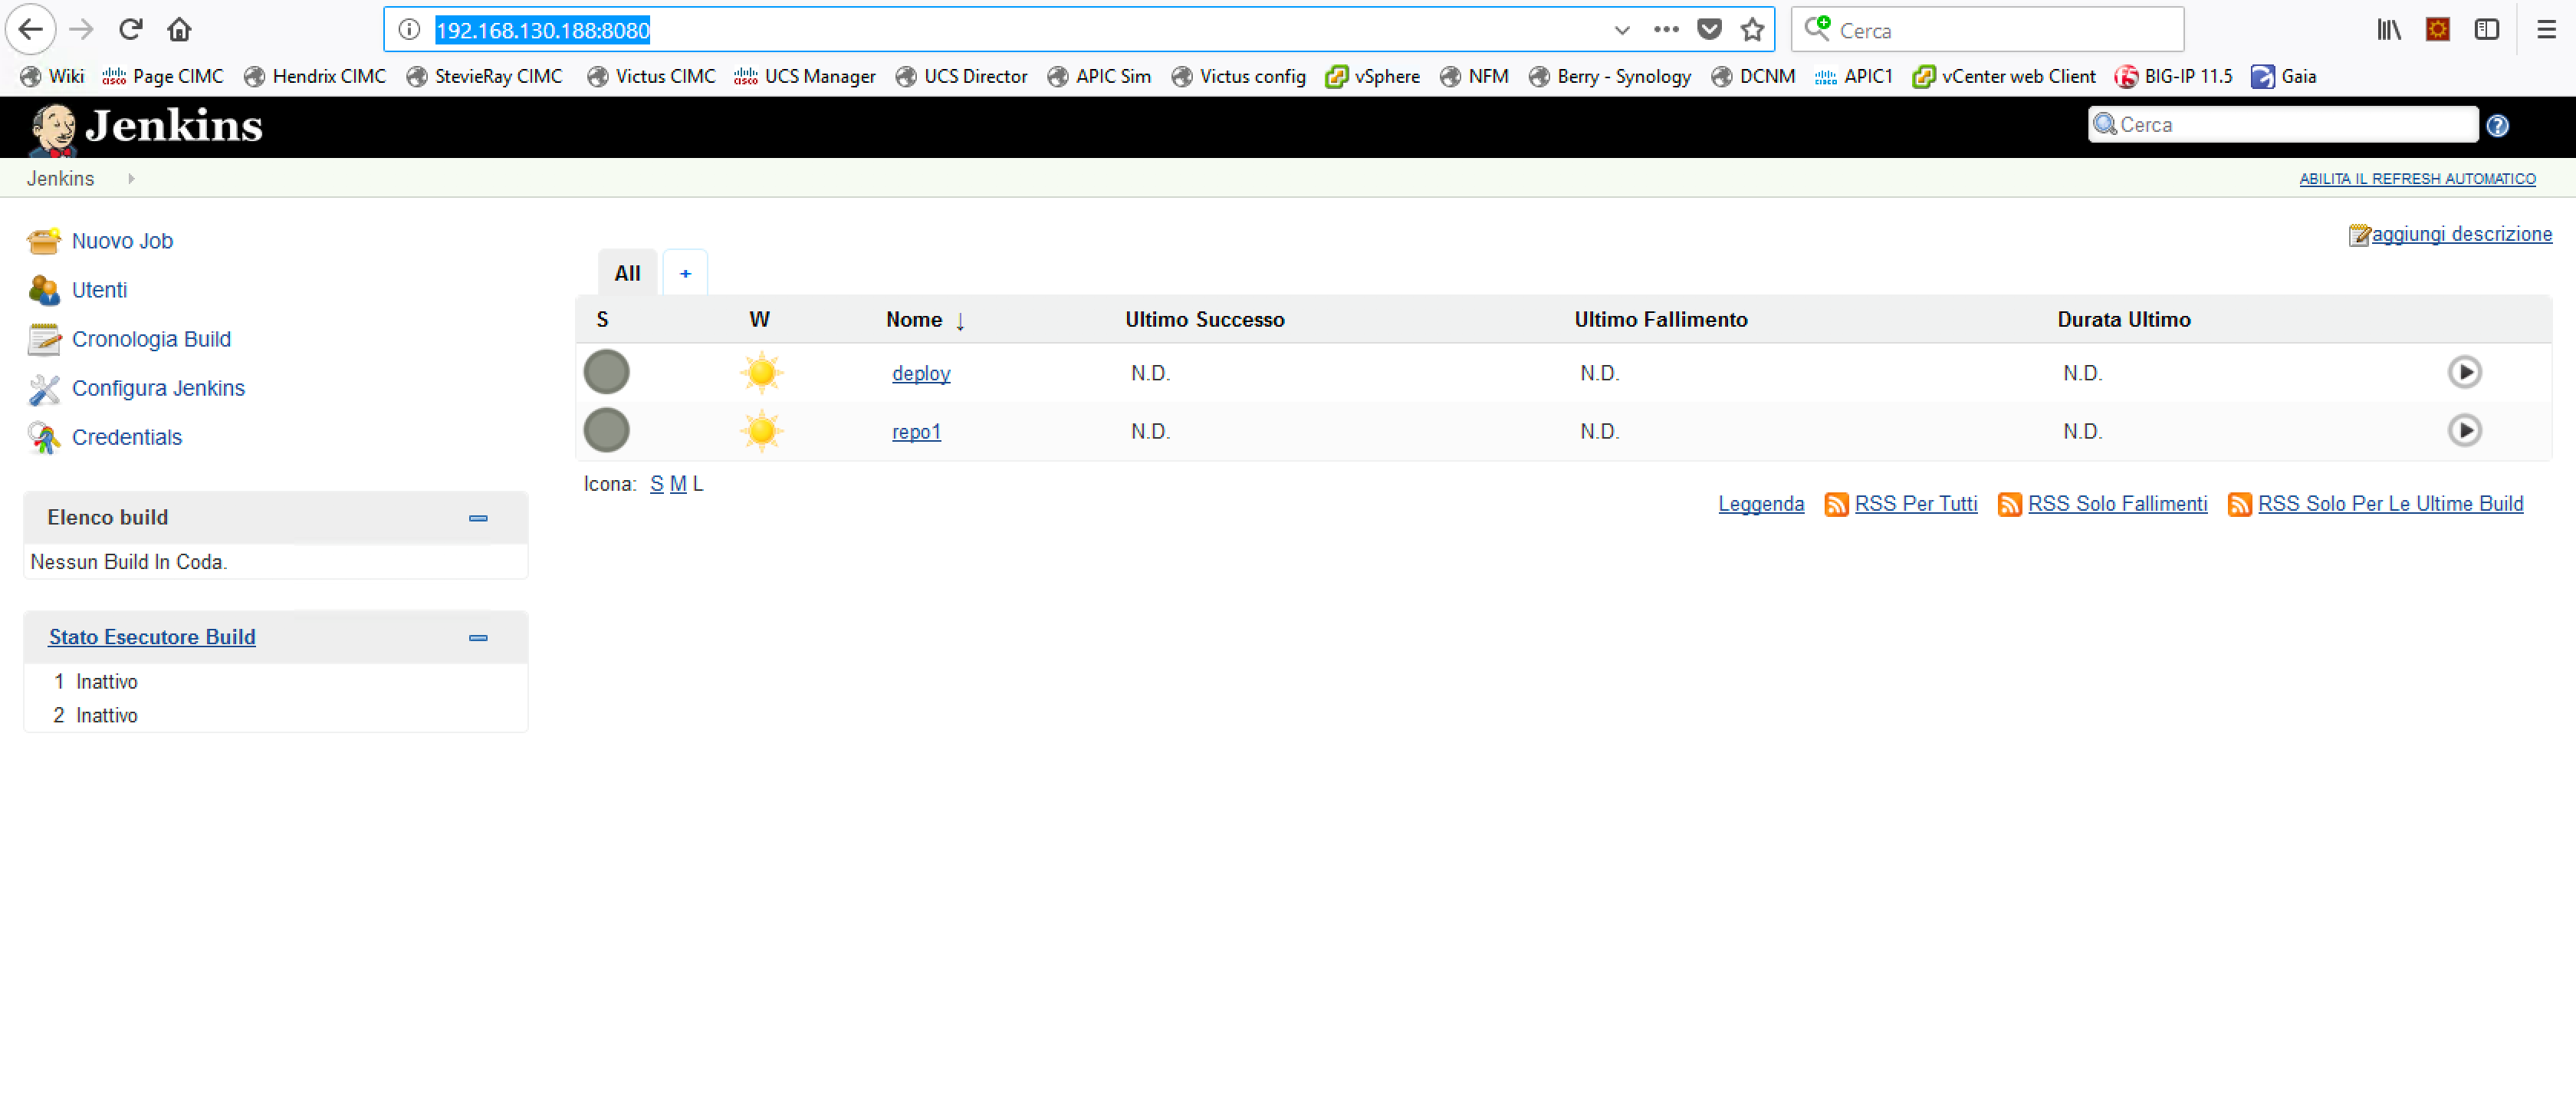
The Jenkins orchestrator and the 2 tasks created by CloudCenter
The only manual configuration we need is to set the login and password used by CloudCenter to access the SVN repository (we were not able to automate this configuration): You just need to click on the Jenkins task repo1 (next picture), then click Configure and enter your credentials (in our example, user001/C1sco123). At this point, Jenkins is fully configured and ready to go.
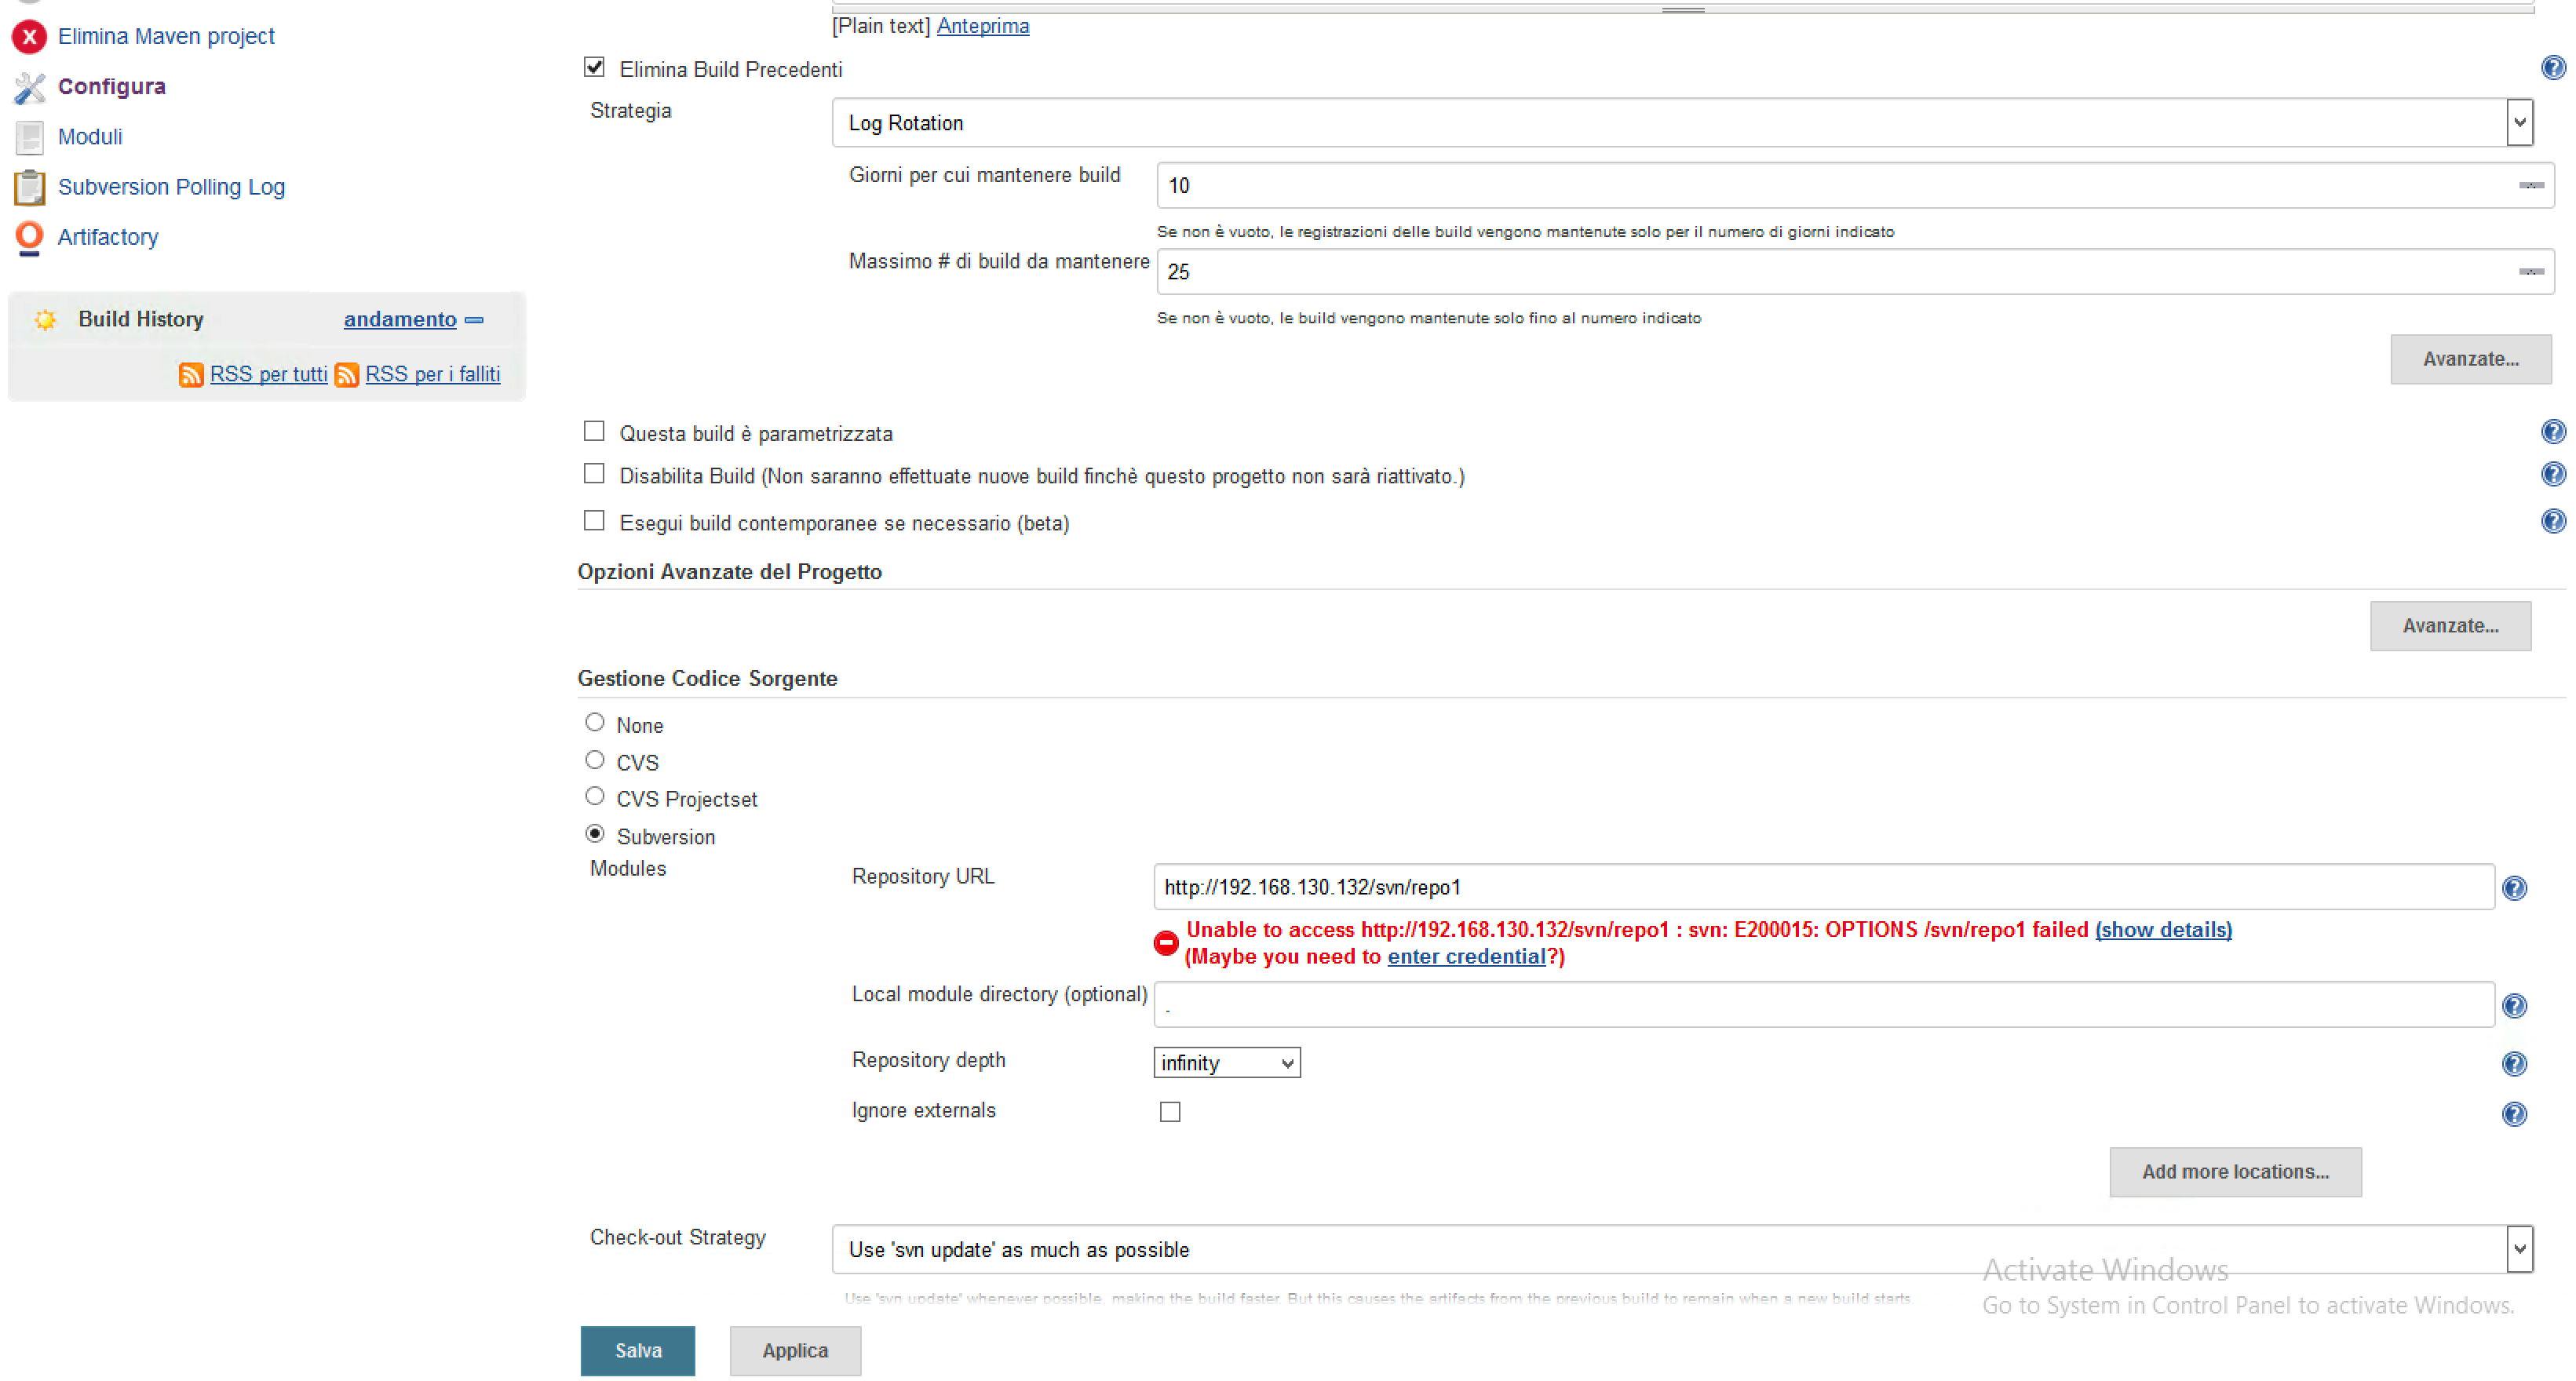
Jenkins: setting credentials to access the SVN repository
The jFrog Artifactory is also ready to receive binaries from Jenkins, at each new build of the application, because CloudCenter sets the required information when configuring Jenkins and Artifactory. Note that the Artifactory repository name (repo1) is the name used for the SVN repository, provided by the user when he ordered the deployment.
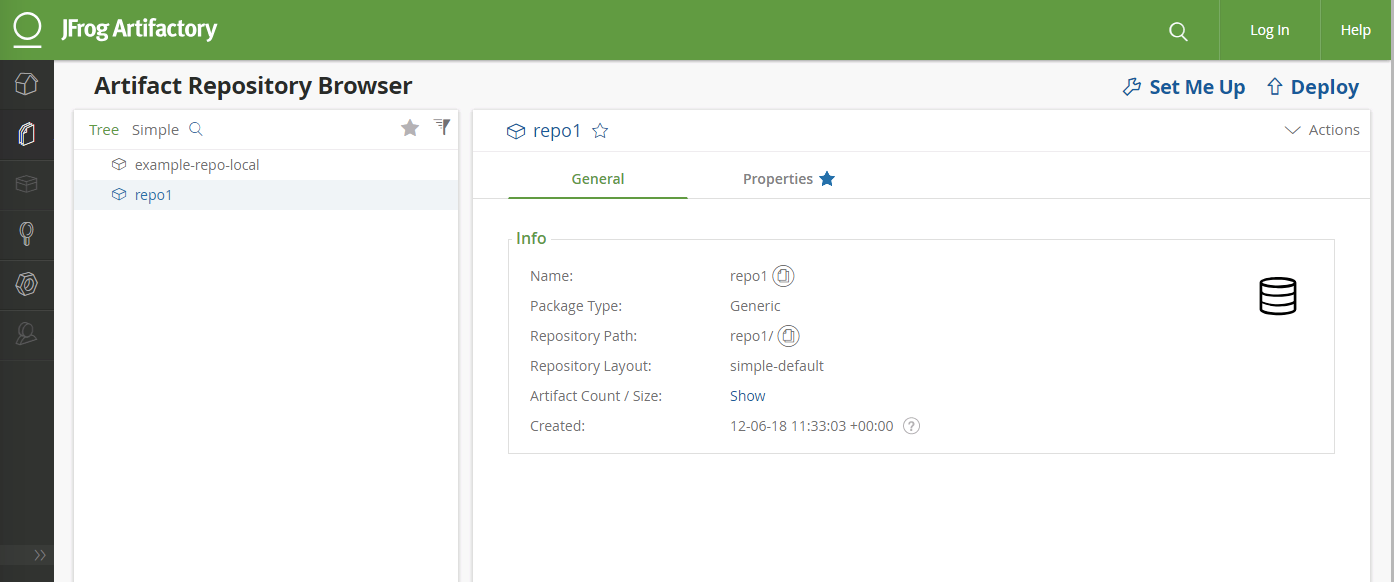
The Artifactory repository for binaries (it will host all the builds generated by Jenkins)
Finally, we configure a new Repository in CloudCenter (there might be many), that needs to point at our new Artifactory repository to deploy new builds of your application automatically as they are released.
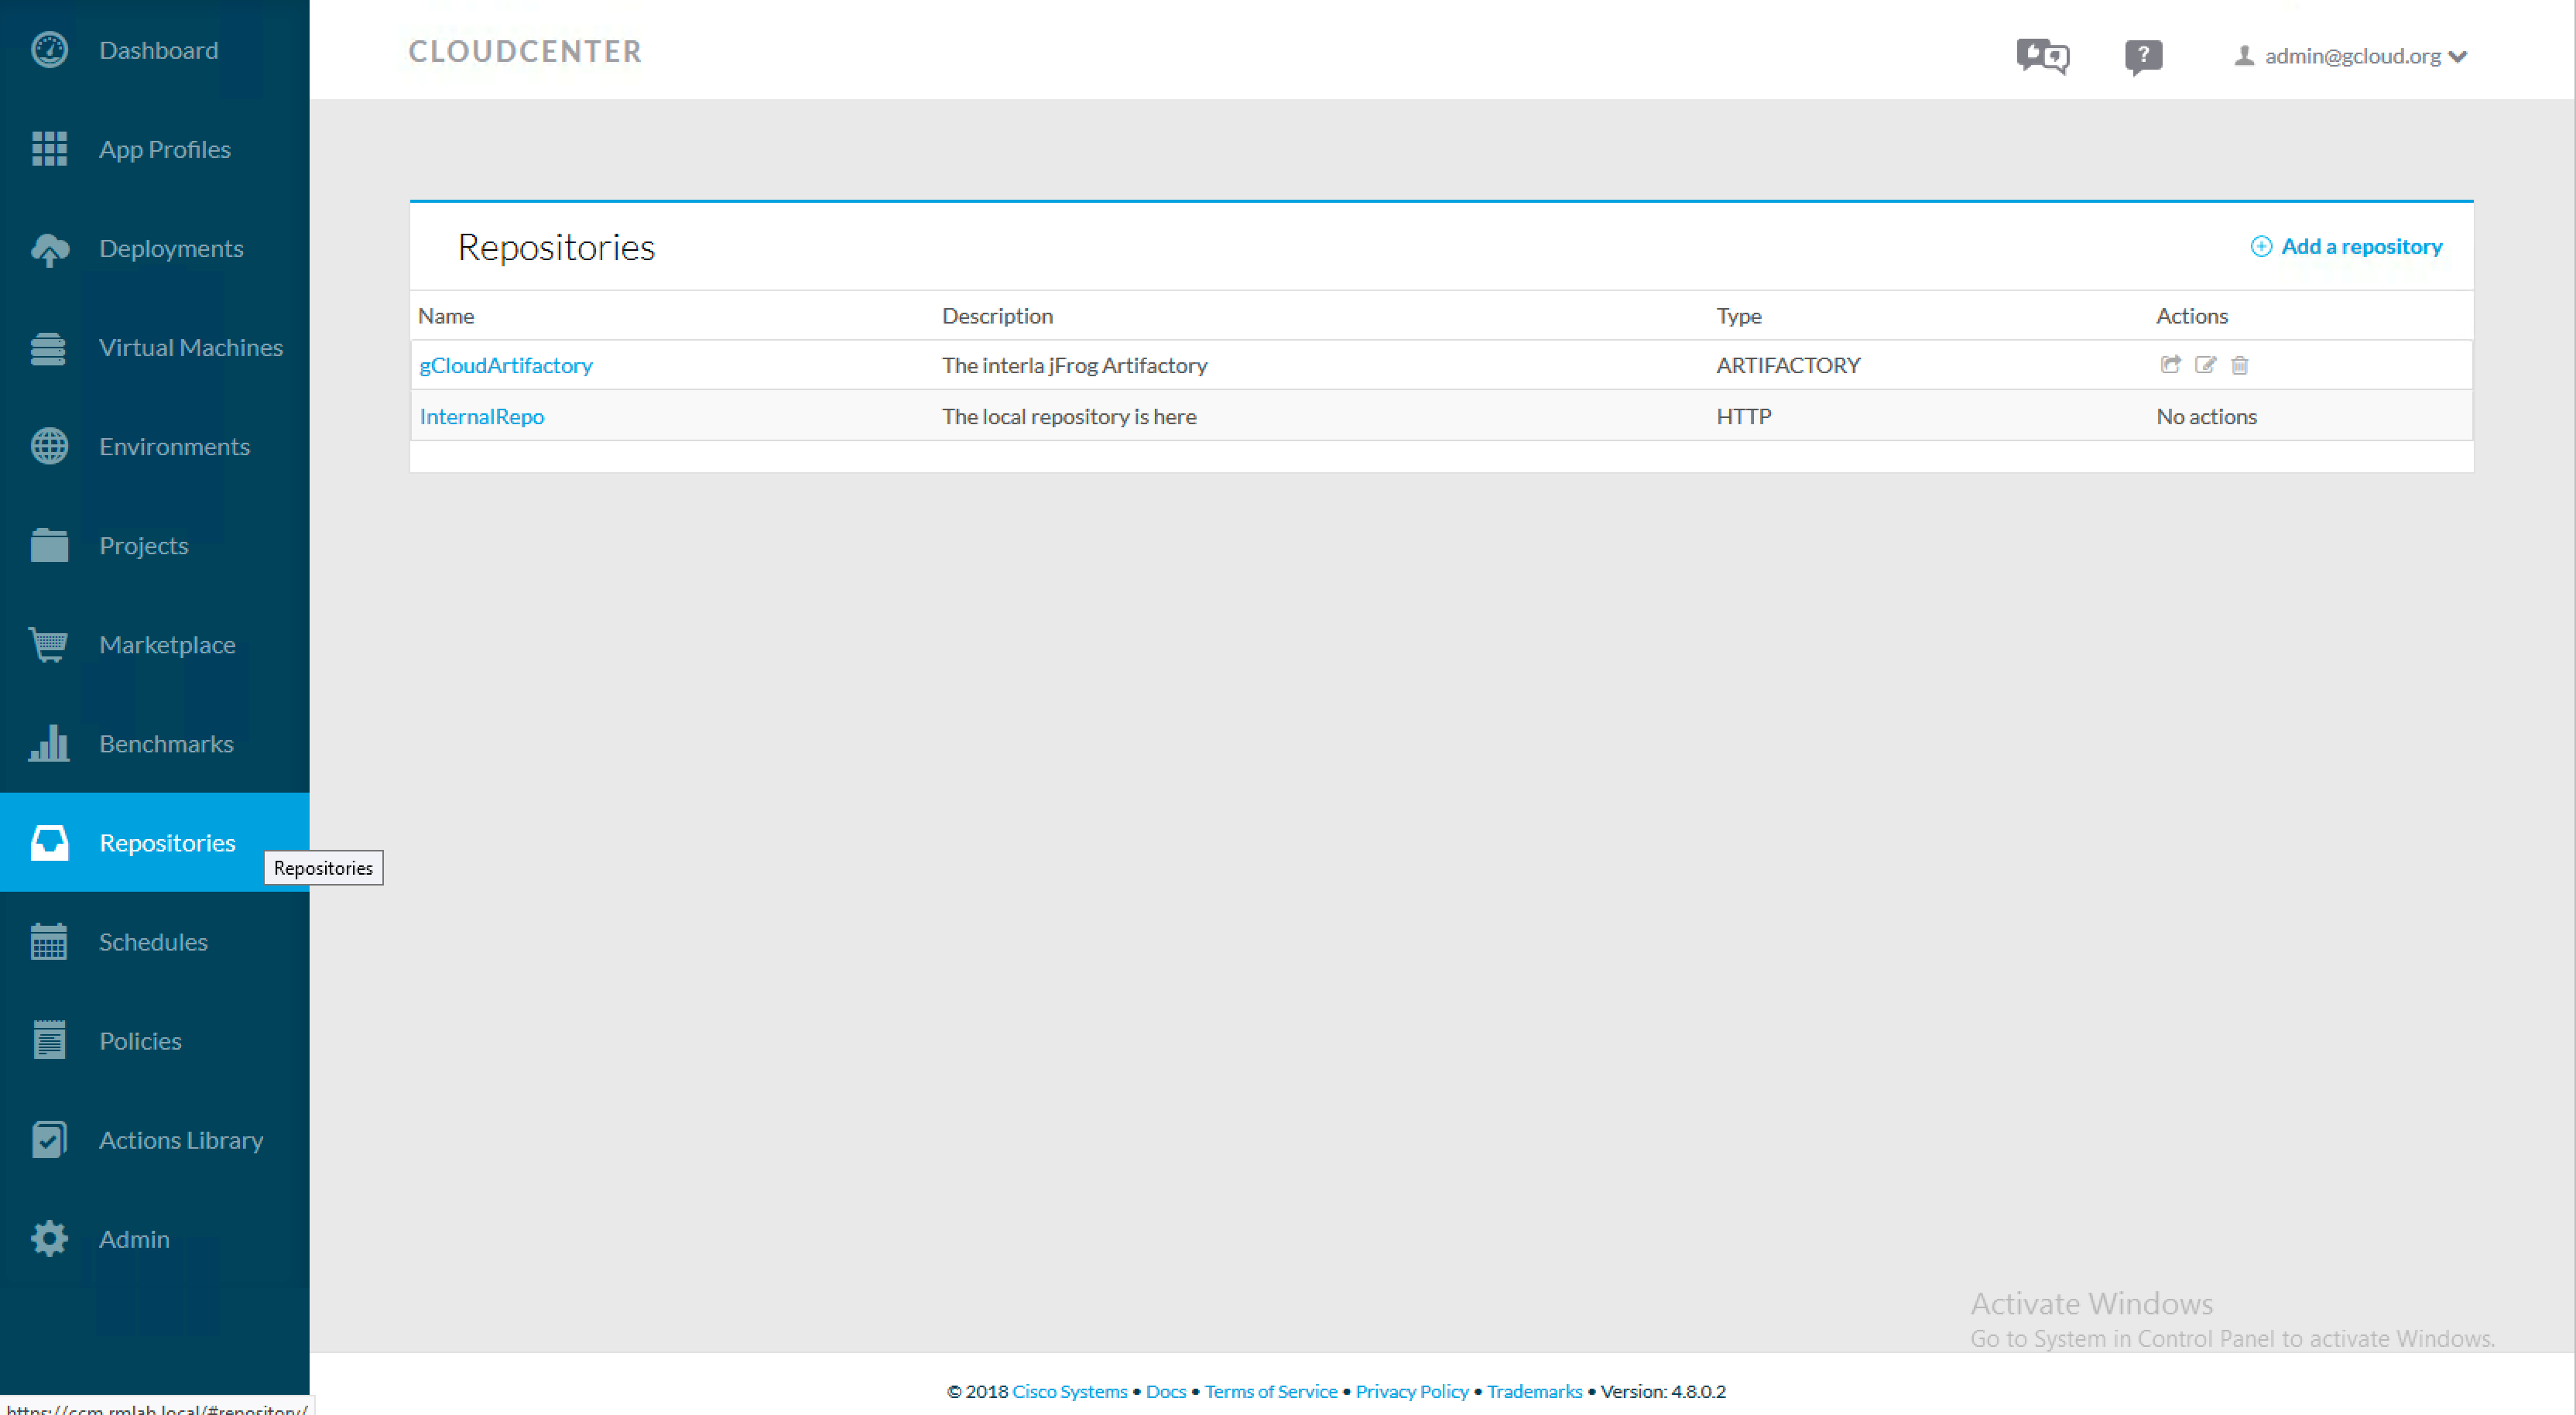 Cloud Center: setting up a repository for the artifacts that will be deployed
Here we set the IP address of the Artifactory server:
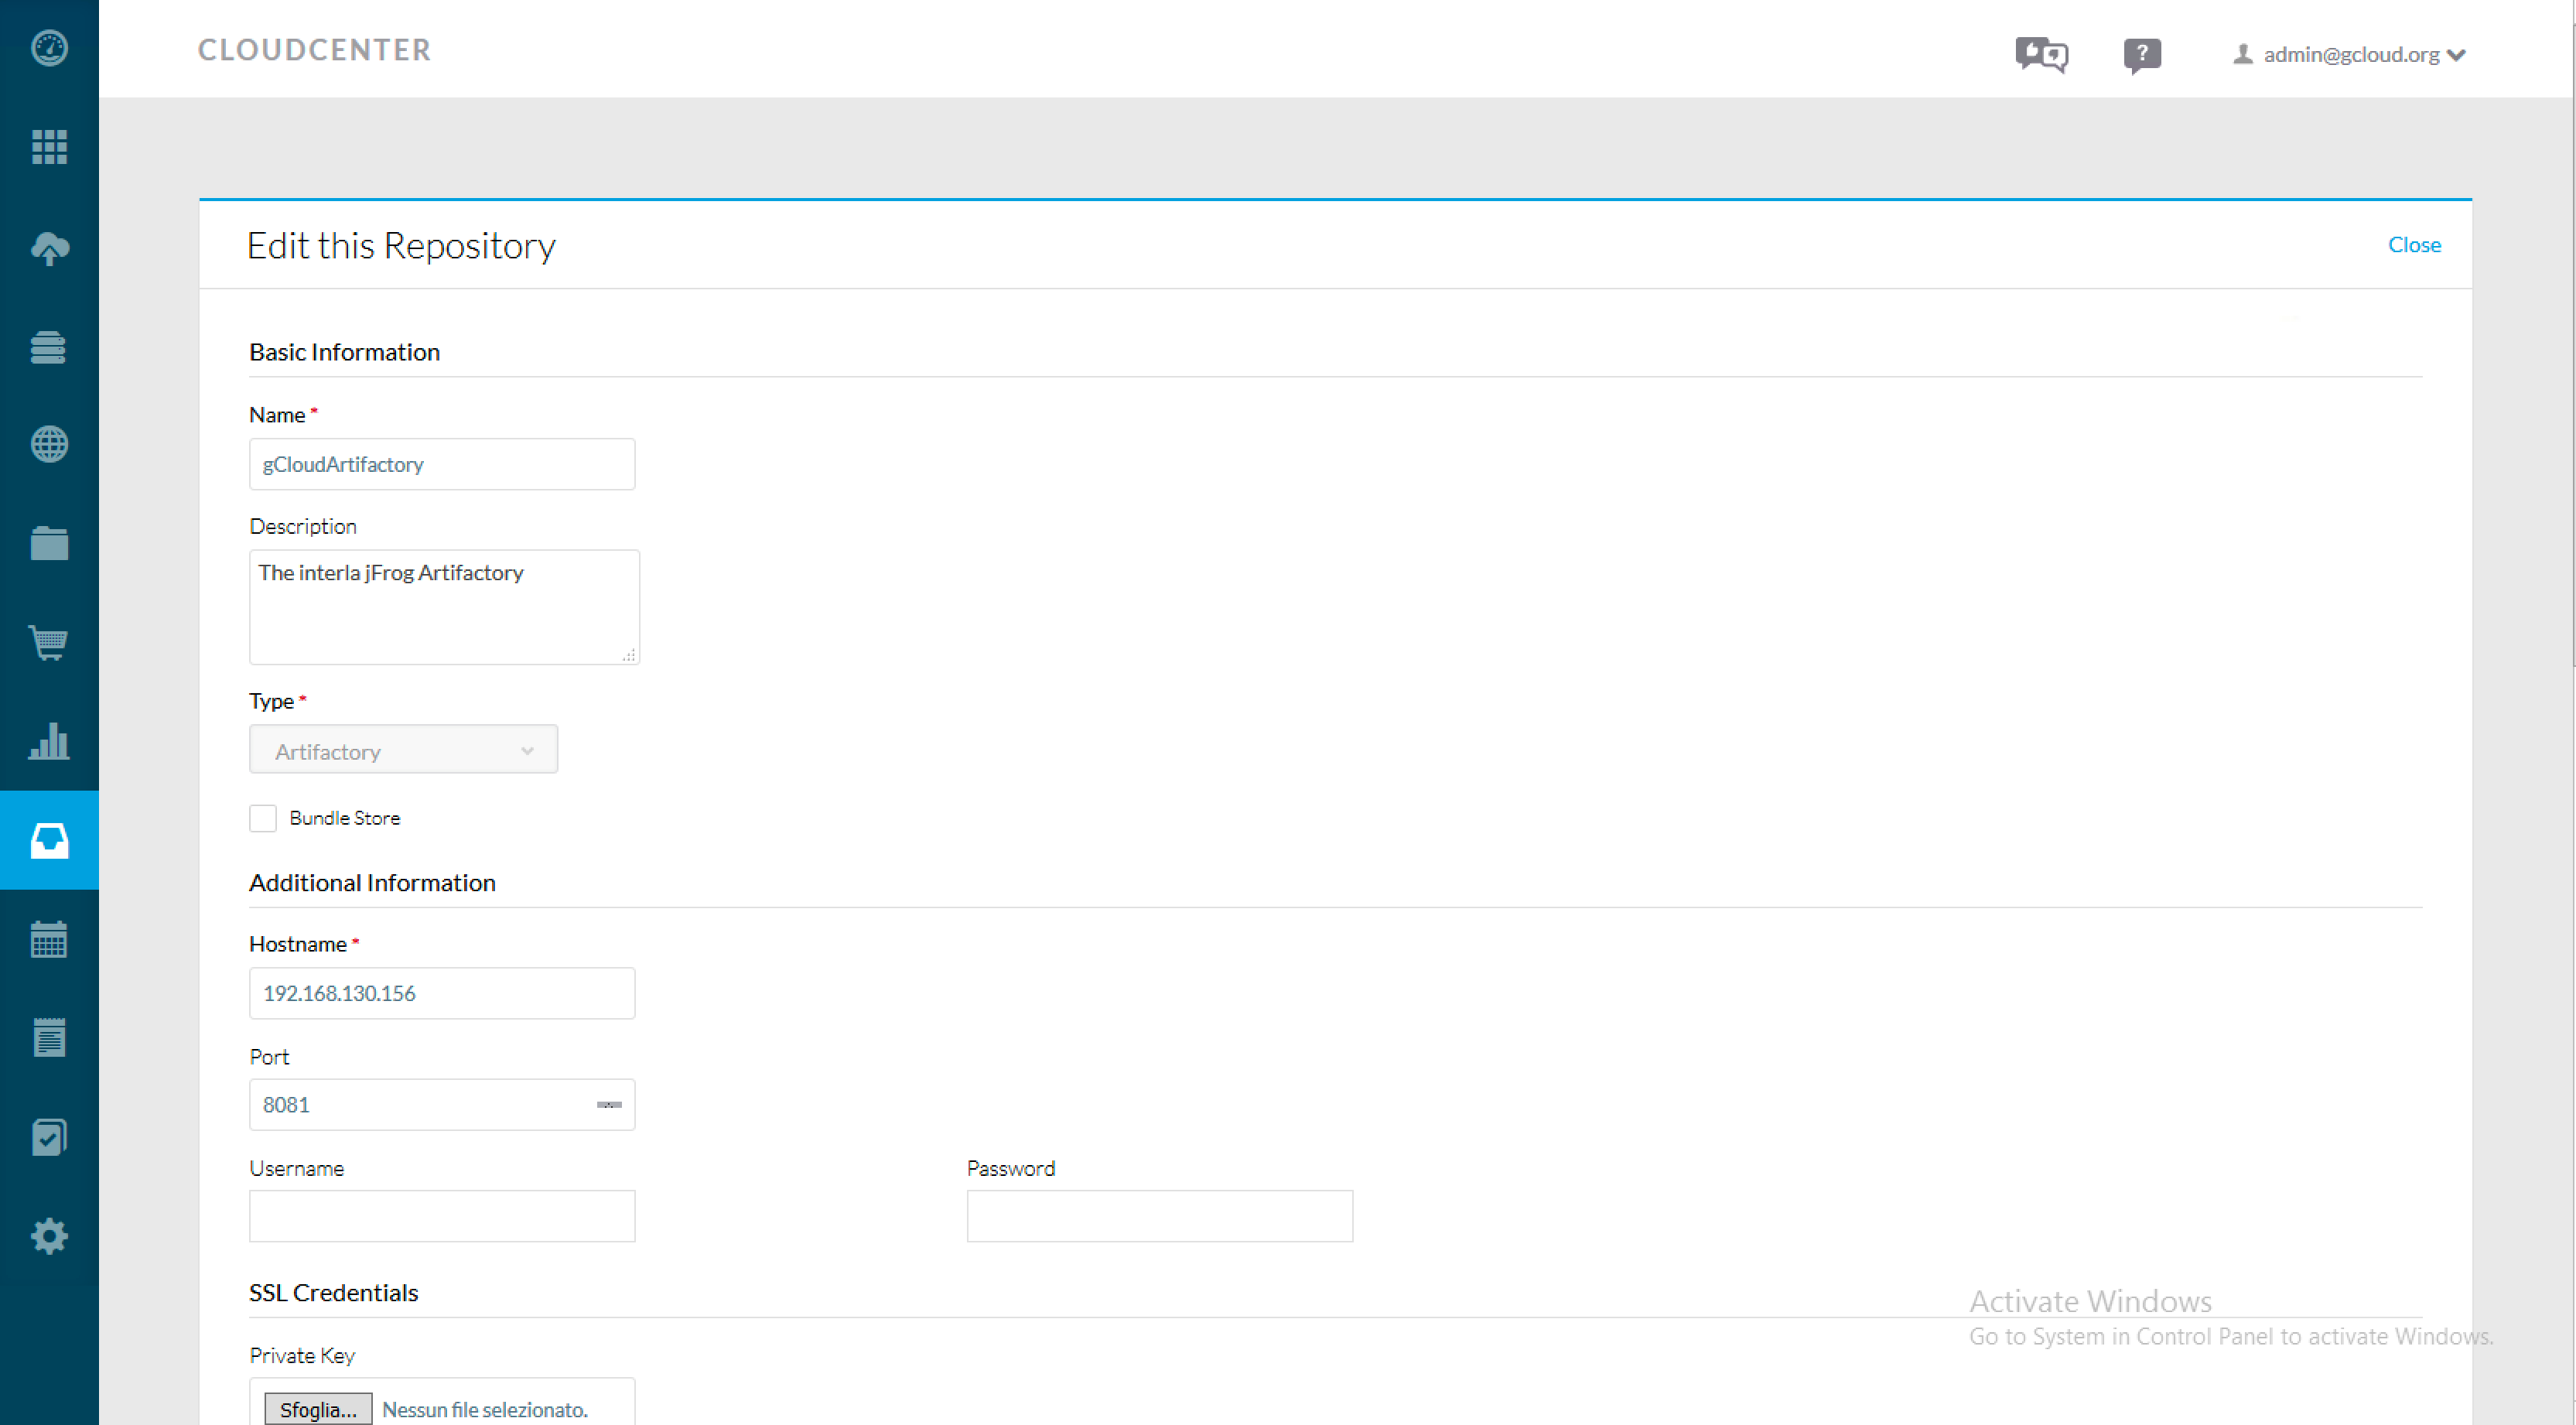 Setting up the repository on Cloud Center
We have now completed the setup of a CI/CD environment for a new project in 15 minutes.
The whole idea of CI/CDaaS is nothing more than the concept of being able to replicate that exact process with an "as a service" approach, quickly and easily, for different internal teams, depending on the requirements.
In the next post will show how to use it, following the lifecycle of the PetClinic application from editing the source code to automated deployment.
Credits
This post is co-authored with a colleague of mine, Stefano Gioia.
 Tags quentes :